
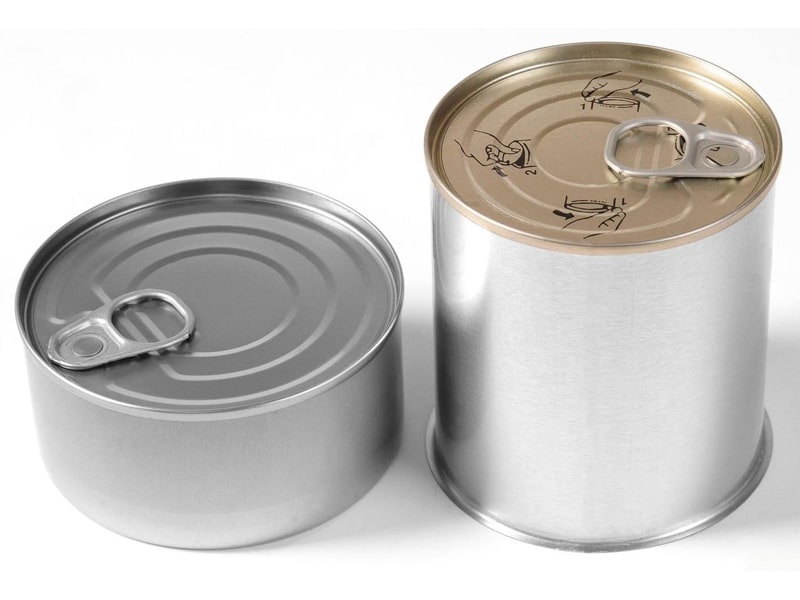
A can sealing machine (also called a can sealer or can seamer) is an industrial device that clamps and crimps lids onto filled cans to form an airtight (hermetic) seal. In practice, a can sealer creates a double seam by mechanically folding the can’s top flange and the lid’s curled edge together in two passes. This leak-proof seam prevents air or bacteria from entering the can, keeping food, beverage, or chemical products fresh and safe. For example, SFXB notes that our tin can sealers use advanced sealing mechanisms to guarantee a hermetic seal and minimize spoilage. Modern machines often integrate inert-gas or vacuum systems to further preserve contents by removing excess oxygen before sealing.
Can sealing machines come in various forms (manual, semi-automatic, or fully automatic), but all serve the same purpose: to securely join a can body and lid. A can seamer/sealer is a machine used for sealing cans, and it can handle cans made of tinplate steel, aluminum, and even non-metal containers. High-capacity sealers may have multiple seaming heads working in parallel to boost production speed. In a production line, empty cans are filled and then conveyed to the sealer, where lids are automatically placed on top before sealing begins. In essence, a canning sealer machine is the linchpin of any canning operation, ensuring that each can is tightly closed to meet industry safety standards.
Key Components of a Can Sealing Machine
Can sealing machines are engineered with several key parts that together form the double seam:
- Chuck (Seamer Head): The chuck holds the can lid down on the can body and resists the pressure from the seaming rollers. It acts as the support for the lid during sealing and is sized to match the can diameter.
- Base Plate / Turntable: A rotating platform (also called a turntable) that supports the can body and spins it under the chuck. As the rollers engage, the base plate lifts and turns the can so the seam is formed uniformly around the rim.
- Seaming Rollers: A pair of hardened rollers do the work of forming the seam. The first roller folds the lid’s curled edge (also called the “curl”) around the can’s flange, and the second roller irons and tightens the seam. Together, these rollers create the two interlocking hooks of the double seam – one from the lid and one from the can.
- Vacuum / Pressure Chamber: Many sealers include a sealed chamber where air is evacuated before sealing. By pulling a vacuum or introducing an inert gas (such as nitrogen), the machine removes oxygen from the can. This protects sensitive foods from oxidation and microbial growth before the lid is sealed.
- Feeder and Lid Track: In automatic systems, lids are delivered to the sealer via a feeder or track. These mechanisms orient and feed lids (caps) one by one into position above the can before sealing.
- Conveyors: Conveyors transport filled cans to the sealer and carry away the sealed cans afterward. In a continuous line, multiple machines (filling, rinsing, sealing, labeling) are linked by conveyors for high throughput.
- Ejector Pin: A spring-loaded pin in the center of the chuck, used to push the finished can out of the seaming head after sealing. It also helps align the lid on the can’s center during the sealing process.
Each of these components must be precisely engineered and aligned. For example, the chuck and seaming rollers must match the can’s size, and the turntable’s rotation speed is synchronized with the roller action. Together they ensure the lid and can “hook” correctly on the first and second seaming operations, producing a reliable seal.
The Double-Seaming Process: Step by Step
Sealing a can involves three main stages of double seaming, each critical for a tight joint. Skilled machines and operators carefully control each step:
Stage I: Compression and Lid Placement
Initially, a can (already filled with the product) is positioned on the turntable and held down by the chuck. The chuck clamps the lid onto the can, and the base plate moves the can upward. During this stage, many machines evacuate air from the chamber (or flush it with nitrogen) to preserve the contents. The lid’s curled edge (the curl) is pressed into the can’s flange. This “compression” step begins the interlocking of the lid and can. This initial pass pre-forms the seam and sets up the metal for the roller operations that follow.
Stage II: First Roller Operation
In the second stage, the first seaming roller engages. It pushes the lid’s curl outward and around the can flange. The roller gradually rolls around the circumference, bending the metal to form the first operation of the double seam. Essentially, this step wraps the lid onto the can: as the roller moves, the flange of the can begins to merge with the curl of the lid. During this pass, the first roller pushes the curl resulting in a turnaround… then the flange follows,” which brings the lid and can edges together. The seam starts to take shape, but it is intentionally not fully tightened yet. It is important that this seam is neither too loose (which would cause leaks) nor too tight (which could distort the can). This first roller operation creates the cover hook (from the lid) and the body hook (from the can flange), which are the two parts of the double-seam interlock.
Stage III: Second Roller Operation
The final stage involves the second seaming roller. Once the hooks are engaged, this roller “irons out” the seam. It presses firmly on the partially formed seam to compact it tightly. In practice, the second roller travels around the can and rolls down any excess material, tightening the joint into its final shape. Often a sealing compound (food-grade varnish) is applied at this point to coat the seam and further guard against leaks. By the end of Stage III, the lid and can body are crimped together in a finished double seam that is typically 5–6 millimeters wide. The result is a hermetic seal: the can is now fully closed and leak-proof.
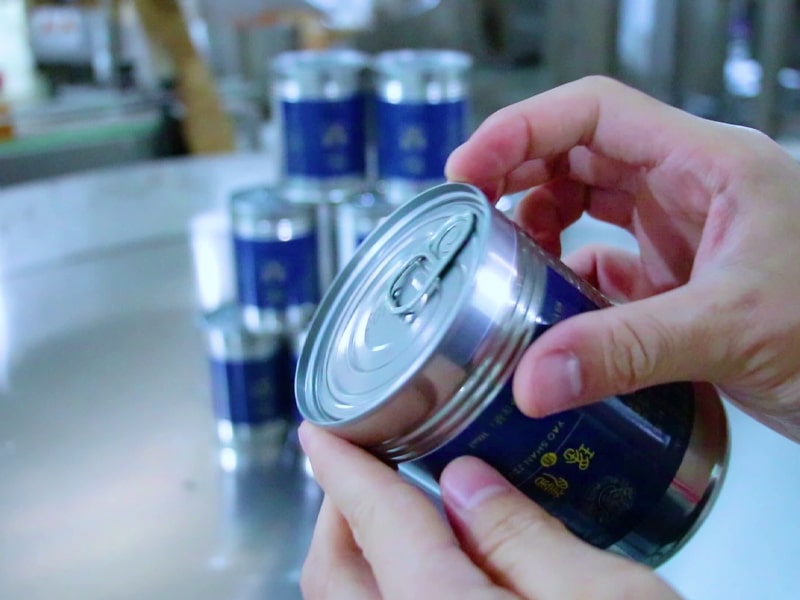
After the second roll, the machine may automatically eject the sealed can. Quality control steps (not part of the seaming itself) will follow, such as visual inspection of the seam and leak testing (often by vacuum or pressure decay) to ensure every can has been sealed correctly. Overall, the double-seaming process is what makes can sealer machines so effective: two precise roller passes convert two flat metal rings (the lid and can rim) into a single locked seam.
Types of Can Sealing Machines
Can sealers vary by automation level and application. Key categories include:
- Manual Can Sealer: This is a hand-operated device (lever, crank, or bench-top sealer) used for small batches or prototype runs. A typical manual sealer has a base plate for the can and a lever mechanism that the operator pulls down to crimp the lid. The operator applies about 20–40 pounds of force via the lever to fold the lid’s edges onto the can. Manual sealers are common in cottage industries and breweries for sample canning, since they are relatively inexpensive and simple. They have three main parts (base, handle, lid-closing tool) and produce a two-hook seal similar to an automatic sealer, just driven by muscle power.
- Semi-Automatic Can Sealer: In a semi-auto machine, the seaming mechanics are powered, but an operator still loads cans and lids. The operator typically places a can on the turntable, hits a start button, and the machine performs the double-seam cycle. Semi-automatic sealers may require the operator to feed lids into a track and to remove sealed cans from the machine, but they significantly speed up the process compared to purely manual methods. Semi-automatics are often part of a continuous line where the operator’s main job is to keep feeding lids and monitor the operation. These are great for moderate production levels: they offer automation and consistent sealing, but with lower throughput (and cost) than fully automatic machines.
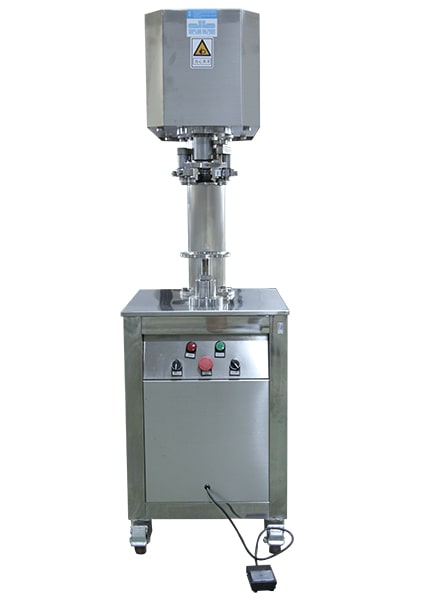
FG130C Semi-Automatic Can Sealing Machine
- Automatic Can Sealer: A fully automatic can sealer handles cans and lids continuously with minimal human intervention. In these machines, cans and lids are fed automatically via conveyors and feeders, and the machine cycles repeatedly as cans pass through. Automatic sealers helps create an airtight seal with every step automated. They can achieve very high speeds (often hundreds of cans per minute) and are used in large food, beverage, and chemical plants. The trade-off is cost: fully automatic machines have a high initial investment, but they offer higher output and efficiency.
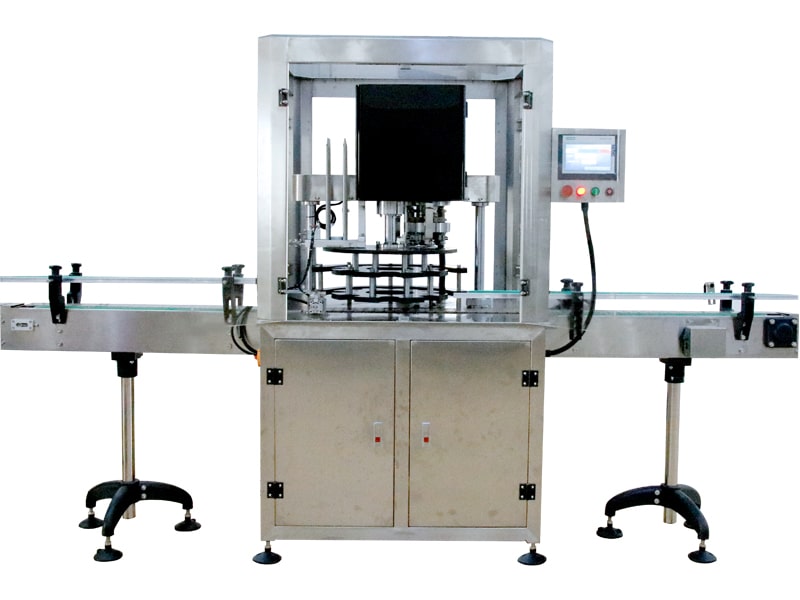
FG-130G Automatic Can Sealing Machine
Regardless of type, the end result is the same: a high-quality seam. you might even see phrases like “can sealer machine for sale”, “canning sealer machine”, or “can sealer” to describe these units. Suppliers often offer variants like tin can sealers (for steel cans) or aluminum can sealers for beverage lines. The choice depends on production volume, can size, and budget. For example, a small craft producer might buy a manual can sealer from an online catalog, while a global bottler invests in an automated seaming machine line.
Can Materials and Sealer Variants
Can sealing machines handle various container types:
- Tin-Plate (Steel) Cans: These are the traditional “tin cans” once common for foods. A tin can sealer is essentially a standard can seamer configured for steel (tin-plated) cans. It uses steel-compatible tooling and typically presses a bit harder, since tinplate is stiffer.
- Aluminum Cans: Aluminum cans (like soda or beer cans) are sealed in a similar way. They are lighter and thinner, but the double-seam process is the same. Many canners actually seal aluminum cans using the same kind of seaming machine; the machine “knows” the can height and diameter. There are also aluminum can sealer models optimized for high-speed beverage lines.
- Other Materials: Although the name implies metal, some sealing machines adapt the concept to other containers. For example, rigid paperboard (composite) cans or plastic cans can be sealed, but often with heat-sealing or induction methods rather than mechanical seams. However, many manufacturers loosely include those in “canning equipment” categories. The keywords “canning sealer machine” or “can sealer machine” often cover all these applications.
In all cases, the sealer must match the container’s shape and size. Multi-head machines can even have different tooling to switch between can types. But whether sealing a tin can of fruit or an aluminum beverage can, the goal is identical: lock in the freshness by creating a tight double seam.
Why Proper Sealing Matters
Correct can sealing is vital for product quality and safety. A good seam prevents leaks and contamination. As one packaging expert explains, without a proper seal “spoilage, reduces waste,” and no one wants that. Hermetic seals also enable products to meet shelf-life specifications. For example, removing air (vacuum sealing) can extend shelf life dramatically by stopping oxidation.
Quality control is built into modern sealing lines. After sealing, machines or operators check for seam defects (visually or with detectors). Any can with an imperfect seal is rejected or reprocessed. Over time, maintenance ensures reliability: dust or debris can ruin a seal, so equipment is cleaned regularly. Manufacturers advise routine inspection of components like rollers and chucks, and replacing worn parts promptly. Consistent pressure and alignment are needed for every can – small errors can create pinholes or weak seams. In short, a well-maintained can sealer machine gives customers the assurance that every can is properly closed and safe to use.
Choosing and Using a Can Sealer Machine
When selecting a can sealing machine, buyers evaluate factors such as production speed, can size range, and whether manual or automatic operation is needed. For example, searching “can sealer machine for sale” online will reveal both bench-top manual models and large rotary can seamers. Small manufacturers may favor a manual can sealer or a bench-top semi-auto (which can handle a few dozen cans per minute) to save space and cost. Large producers, by contrast, invest in fully automatic lines that can seal many hundreds or thousands of cans per hour.
Whichever model, operators must be trained in its use. Safety precautions (like guarding moving parts) and setup steps (choosing the right chuck size, adjusting roller pressure) are crucial. Many machines come with an instruction manual detailing setup by can diameter and height. For a manual sealer, the operator simply places the can and turns the lever or crank until the seals form. For automated machines, safety circuits ensure the lid and can are correctly positioned before each cycle.
Ultimately, a quality can sealing machine is an investment in product quality. By understanding the science and mechanics, engineers and buyers can choose the right sealer to keep their products fresh and uncontaminated.
Maintenance and Quality Assurance
Maintaining a can sealing machine ensures long-term reliability. Regular cleaning of the chuck and rollers prevents buildup of residual sealing compound or food particles. Technicians also check that the seamers and turntables remain square and true. Any misalignment can cause double seams to form unevenly. Lubrication of moving parts is done per the manufacturer’s schedule.
Quality assurance after sealing includes inspecting seam appearance and, in many plants, conducting leak tests. An inline vacuum or pressure tester can automatically detect cans that are not fully sealed. Visual inspection of the cross-section (by cutting sample cans open) is another method to verify that the hook interlock meets specifications. Because seals are so critical, even minor deviations are corrected immediately. Good machines have built-in sensor systems (e.g. photoeyes or metal detectors) to catch errors like missing lids. Overall, diligent maintenance and inspection ensure that every can sealer machine continues to produce the perfect double seam it was designed to make.
Conclusion
In summary, a can sealing machine is an essential piece of equipment in modern packaging. Whether closing a can of soup or a tin of paint, the double-seaming mechanism ensures that lids are bonded securely to cans. By automatically folding and compressing metal edges, these machines create leak-proof seals that maintain product freshness and safety. From hand-cranked models for small runs to high-speed automatic lines for mass production, the core principle is the same: a carefully engineered two-step seam. Proper sealing prevents spoilage and waste, and advances like vacuum-capping further enhance shelf life.
Today’s engineers and buyers can rely on these specialized machines to uphold packaging quality. By understanding how a can sealer works, manufacturers can choose the right machine and keep it tuned for optimal performance. The next time you pick up a can of your favorite food or drink, remember that an impressive mechanical journey – powered by precision parts and double-seam physics – has kept that product safe and ready for you.
Frequently Asked Questions (FAQ) About Can Sealing Machines
1. What is a can sealing machine and how does it work?
A can sealing machine (or can sealer) mechanically attaches a lid to a filled can using the double‑seam method. The machine aligns the lid and clamps it with a chuck, then the can rotates on a turntable while two seaming rollers fold and compress the lid curl and body flange, creating a hermetic seal that prevents leaks and contamination.
2. What is the double‑seam process in a can sealer?
The double‑seam comprises two operations: first, one seaming roller folds the lid curl under the can flange to form a hook; second, another roller irons and tightens the seam, locking the lid and body together securely.
3. What are the main types of can sealing machines?
There are manual can sealer, semi‑automatic, and fully automatic machines. Manual models rely on hand or lever action for small batches; semi‑automatics automate the seaming but require an operator to load cans; fully automatic systems feed, seal, and eject cans continuously, ideal for high‑volume production.
4. What differences exist between tin can sealers and aluminum can sealers?
A tin can sealer is optimized for steel (tin‑plated) cans, handling stiffer metal, while an aluminum can sealer is adapted for lighter, thinner aluminum cans. Tooling adjustments and pressure calibration differ between the two to ensure proper double‑seam formation.
5. How long does a sealing cycle take?
A single sealing cycle often takes about 7–10 seconds. Manual or semi‑automatic sealers can reach 5–7 cans per minute (depending on operator speed), while automatic rotary machines can seal hundreds of cans per minute.
6. What key components make up a can sealer machine?
Major parts include: seamer head (chuck), turntable/base plate, first and second seaming rollers, feeder or lid track, ejector pin, and (for automatic machines) conveyors and a sealed vacuum/pressure chamber for lid alignment and air removal.
7. Why is vacuum or inert gas used in can sealers?
Many automatic or semi-automatic canning sealer machines evacuate air or flush the chamber with nitrogen prior to sealing. This removes oxygen to minimize oxidation and microbial growth, thus extending product shelf life.
8. How should a manual can sealer be operated?
With a manual can sealer, the operator places the can and lid in the chuck, then pulls a lever or turns a crank to fold the lid curl over the flange. This simple tool includes a base plate, handle, and lid‑closing mechanism—ideal for low‑volume or prototype sealing.
9. How is quality control done for sealed cans?
Common QC methods include visual seam inspection, seam-thickness testing with seam micrometers, vacuum or pressure decay leak testing, and rejecting cans with wrinkles, misalignment, or loose seams.
10. How do I maintain and calibrate a can sealer machine?
Regular maintenance involves cleaning chuck and rollers, lubricating moving parts, checking alignment between chuck and turntable, adjusting roller pressures, replacing worn tooling, and ensuring proper ventilation around the machine. Follow manufacturer recommendations.


Comments